After noticing a significant number of people online enquiring about how to mount the Starlink dish on their motorhome or caravan, and inspired by the innovative ideas shared by others, I decided to create my own mount before embarking on our 2024 Gap Year adventure. It’s important to note that this mount is specifically designed for easy removal of the dish when travelling, as I prefer not to leave it up while on the move.
I also incorporated a pole mount mechanism that can be released and swung down, simplifying the setup process at each new location.
Here is a video demonstration of the mount, then below you’ll find my shopping list and process.
Before we dive into the details, please remember the standard disclaimer: if you’re uncomfortable using power or hand tools, you should seek assistance. I cannot be held responsible for any accidents while attempting to follow this guide.
First up is my Bunnings Shopping List:
- Philmac 32mm Metric Poly x Poly Pipe Joiner – Bunnings Australia
- Hy-Clor 1.5m – 4.5m Extension Pole 3 Piece – Bunnings Australia
- Dunnings 60 x 100 x 35mm M10 Galvanised Angle Bracket – Bunnings Australia
- I used 2 of these brackets, but this will depend on your specific mounting needs. I used these as I had a flat surface to bolt to with the rear bar of the caravan
- Pinnacle M10 Stainless Steel Nylon Lock Nut – 4 Pack – Bunnings Australia
- Pinnacle M10 Stainless Steel Flat Washer – 6 Pack – Bunnings Australia
- Pinnacle M10 x 50mm Stainless Steel Hex Bolt And Nut – 2 Pack – Bunnings Australia
- The bolts also depend on your own mounting solution but for the fold-down pole, I used a single M10 x 50mm stainless bolt with a couple of M10 washers and a nylon lock nut so it didn’t loosen.
- Metal Mate 30 x 30 x 1.5mm 3m Aluminium Angle – Silver – Bunnings Australia
- The aluminium mounting bracket I made was out of 30mm x 1.5mm angle, as I had this lying around. I made it up so it had some decent surface area to silicone and rivet to the caravan with. While it doesn’t have much weight to hold up I didn’t want it falling off over time!
- QTY 100 Peeled Rivet 4.8mm (3/16) Grip 9mm / 14.5mm Shell Aluminium Steel #66 | eBay
- The rivets I used to attach the bracket to the van are called peel rivets, which I had left over from the installation of my solar panels. These spread wide open behind the wall panel and allow for solid fixing to thin panels. They were very similar to the ones on eBay.
- Pinnacle 3mm Zinc Plated R Clip – 4 Pack – Bunnings Australia
- I made the locking pin using a spare M10 coach bolt I had, removed the thread and drilled a 3.5mm hole in it. I then used this 3mm R clip.
- I have omitted some items that I already had, and as noted above it depends on your specific mounting requirements and where the pole will be located on your caravan. This includes an M5 bolt and nut, various washers, long cup head bolts for mounting to the rear bar, blind rivets etc.
This is the process I used
Step 1
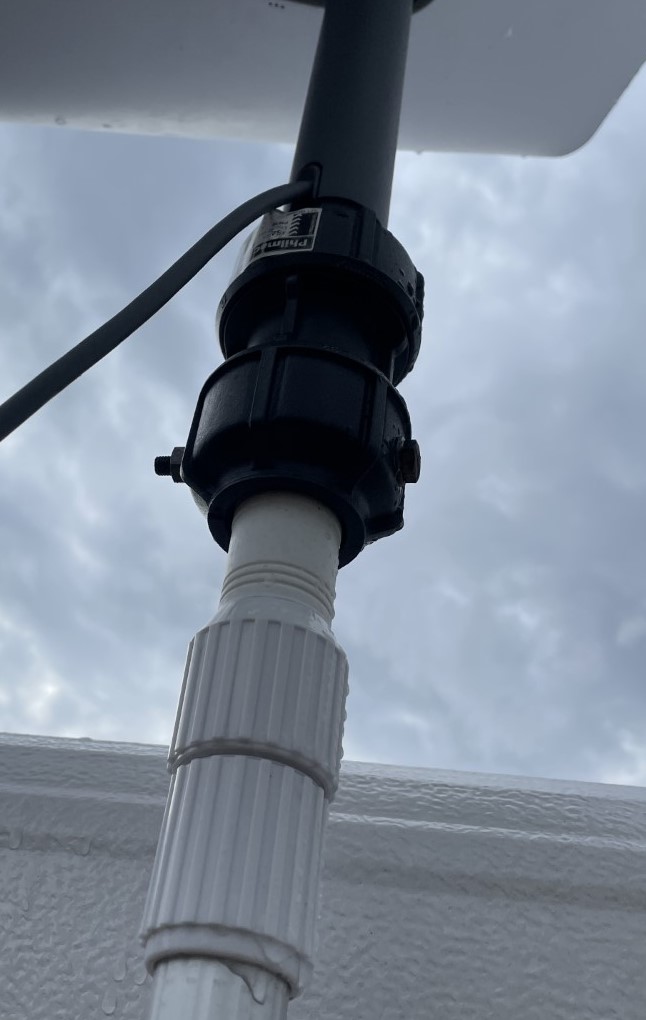
Turn off the Starlink setup and detach the dish (Dishy) from the stand mount, ensuring the cable is also removed. The shaft of the Starlink dish will not initially fit into the opening of the Philmac poly joiner. Use a Dremel tool or similar to carefully widen this opening. The fit should be snug and secure. It’s important to note that this setup is intended for temporary use and should be removed when travelling. Additionally, it’s advisable to take down the dish in windy conditions to prevent damage.
Step 2
Attach the Philmac poly pipe joiner to the end of the pool pole. Loosen the joiner so it can slide onto the pole, then tighten it to secure it in place. Next, drill a 5.5mm hole through both the joiner and the pole, and use an M5 bolt and nut with thread lock glue to fasten them together securely.
Step 3
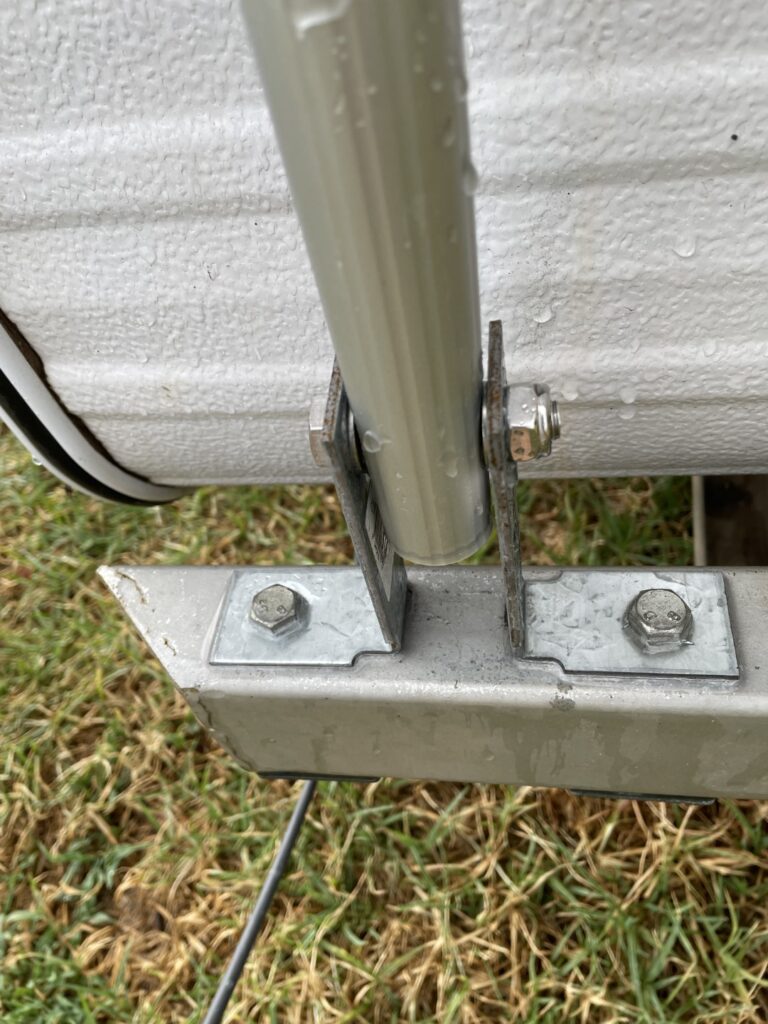
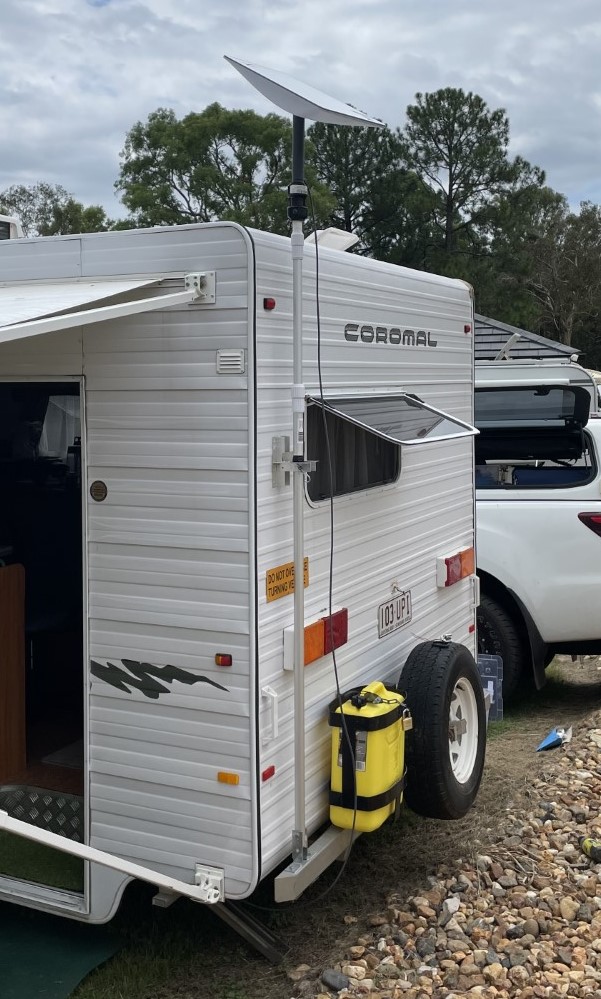
Install the Mounting Brackets- Our caravan has a rear bar with a flat top so I bolted two angle brackets to this surface, ensuring there was a gap between them that accommodated the width of the pool pole. The brackets should allow the pole to stand vertically when mounted and should not obstruct any lights on the back of the van. Drill holes in the brackets that allow for a slight slack, enabling you to fit washers and the pool pole between them. Tighten the bolts to secure the brackets, noting that this may cause slight deformation of the pool pole, but it should not be significant.
Step 4
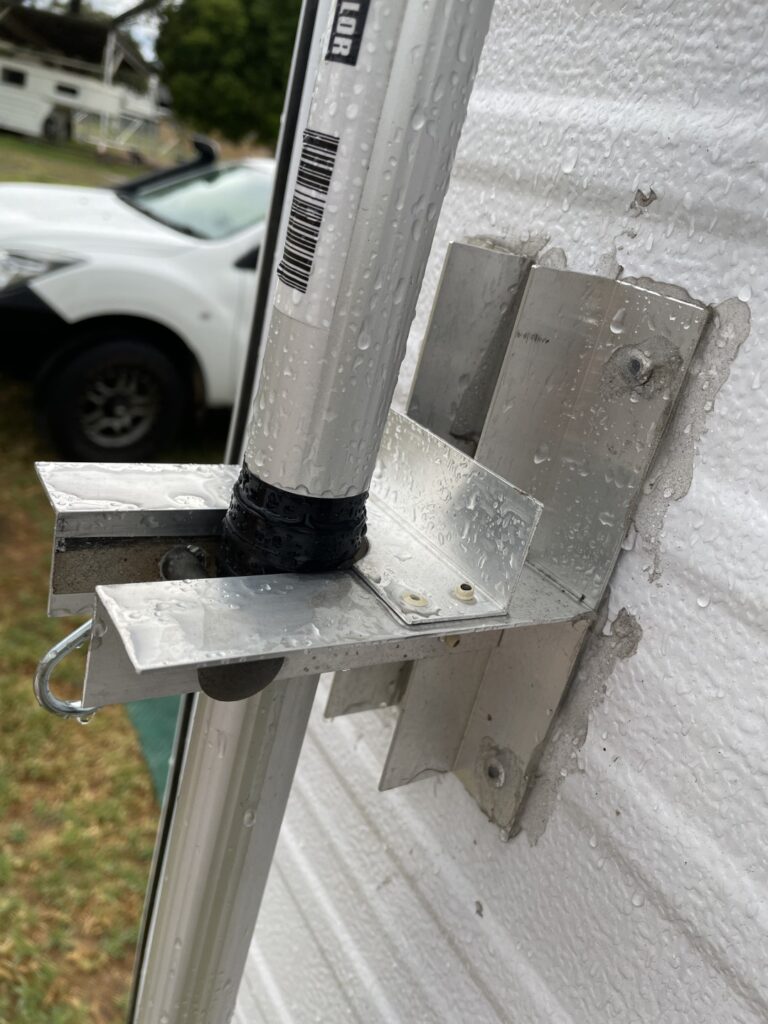
To secure the pole in place, fabricate a wall-mounted bracket using five pieces of aluminium angle. Cut two pieces of aluminium angle for the uprights, each 160mm long, and two pieces for the “arms,” each 120mm long. Rivet these together to form two ‘T’ shapes. Then, join these two ‘T’ shapes together with a 90mm long piece, which should be shaped using a drill and files to create a rounded profile. While this step may be optional, it enhances the overall fit. Leave a gap of about 37mm between the two ‘T’ shapes when riveting them together.
Step 5
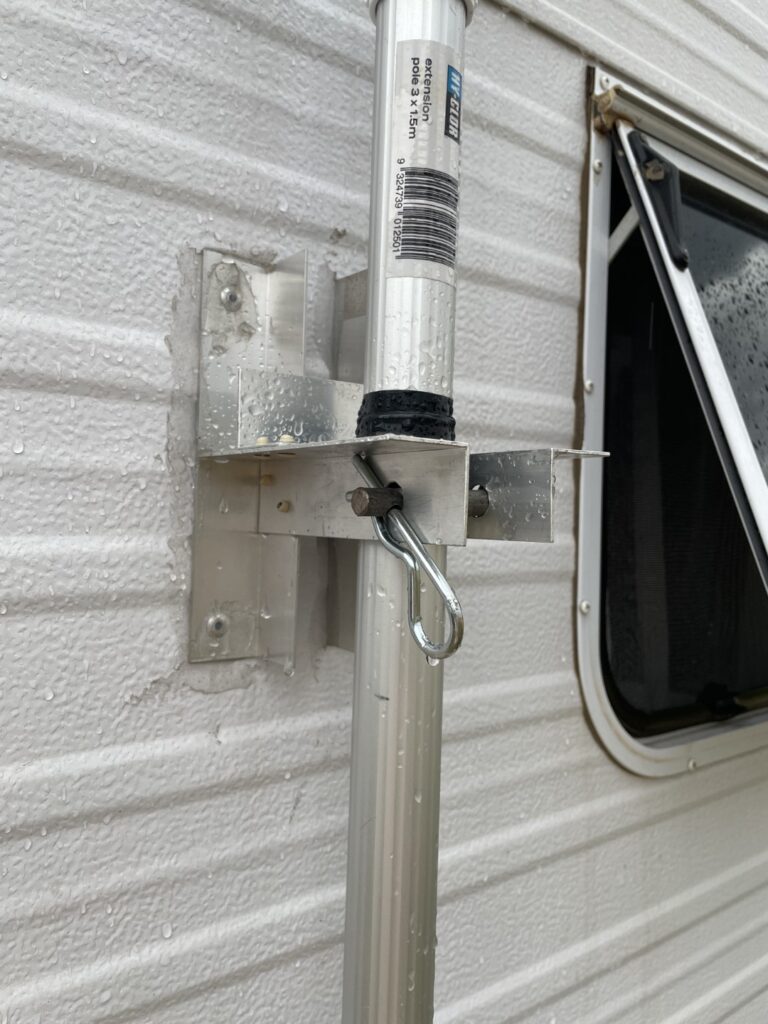
I fashioned a pin from a spare M10 cup head bolt by removing the thread, resulting in a 70mm long cup head pin. I rounded the end using a file and drilled a 4mm hole to accommodate the 3mm R clip.
Step 6
Before fixing it to the van, drill a hole (in my case 12mm) through the bracket to hold the pin made from the cup head bolt, ensuring the pole will have some space to fit in when assembled to the exterior of the van. I allowed a little clearance for the padding which I attached to the pole, from some foam tape, covered with electrical tape to seal.
Step 7
Drill and peel rivet the assembly to the side of the van, ensuring the pole is vertical and it doesn’t cover any lights, number plates etc. Make sure the holes you make in your van are clear of any wiring, and you use plenty of external silicone to seal the holes and provide some additional adhesion.
In conclusion, these instructions should serve as a starting point for designing and constructing your own budget mount. Keep in mind that variations may be necessary based on your specific situation and needs. Wishing you safe and enjoyable travels!
Related Posts

WADDLES, WONDERS, AND CHOCOLATE DELIGHTS: A PHILLIP ISLAND ADVENTURE
Last week, we spent time on Phillip Island, a place renowned for its stunning landscapes, abundant wildlife and natural beauty. And Geese! So many Geese! Check out our adventures below. Penguin Parade After working at the start of the week, we started our “weekend” with the penguins on Phillip Island.…

DIGITAL DECLUTTER PART 1: EMAILS
In today's fast-paced digital world, email has become an essential tool for communication. However, with the constant stream of emails coming in, it can be challenging to keep your inbox clean and organised. An overflowing inbox can cause stress, and anxiety, and even lead to missing important emails. Not to…
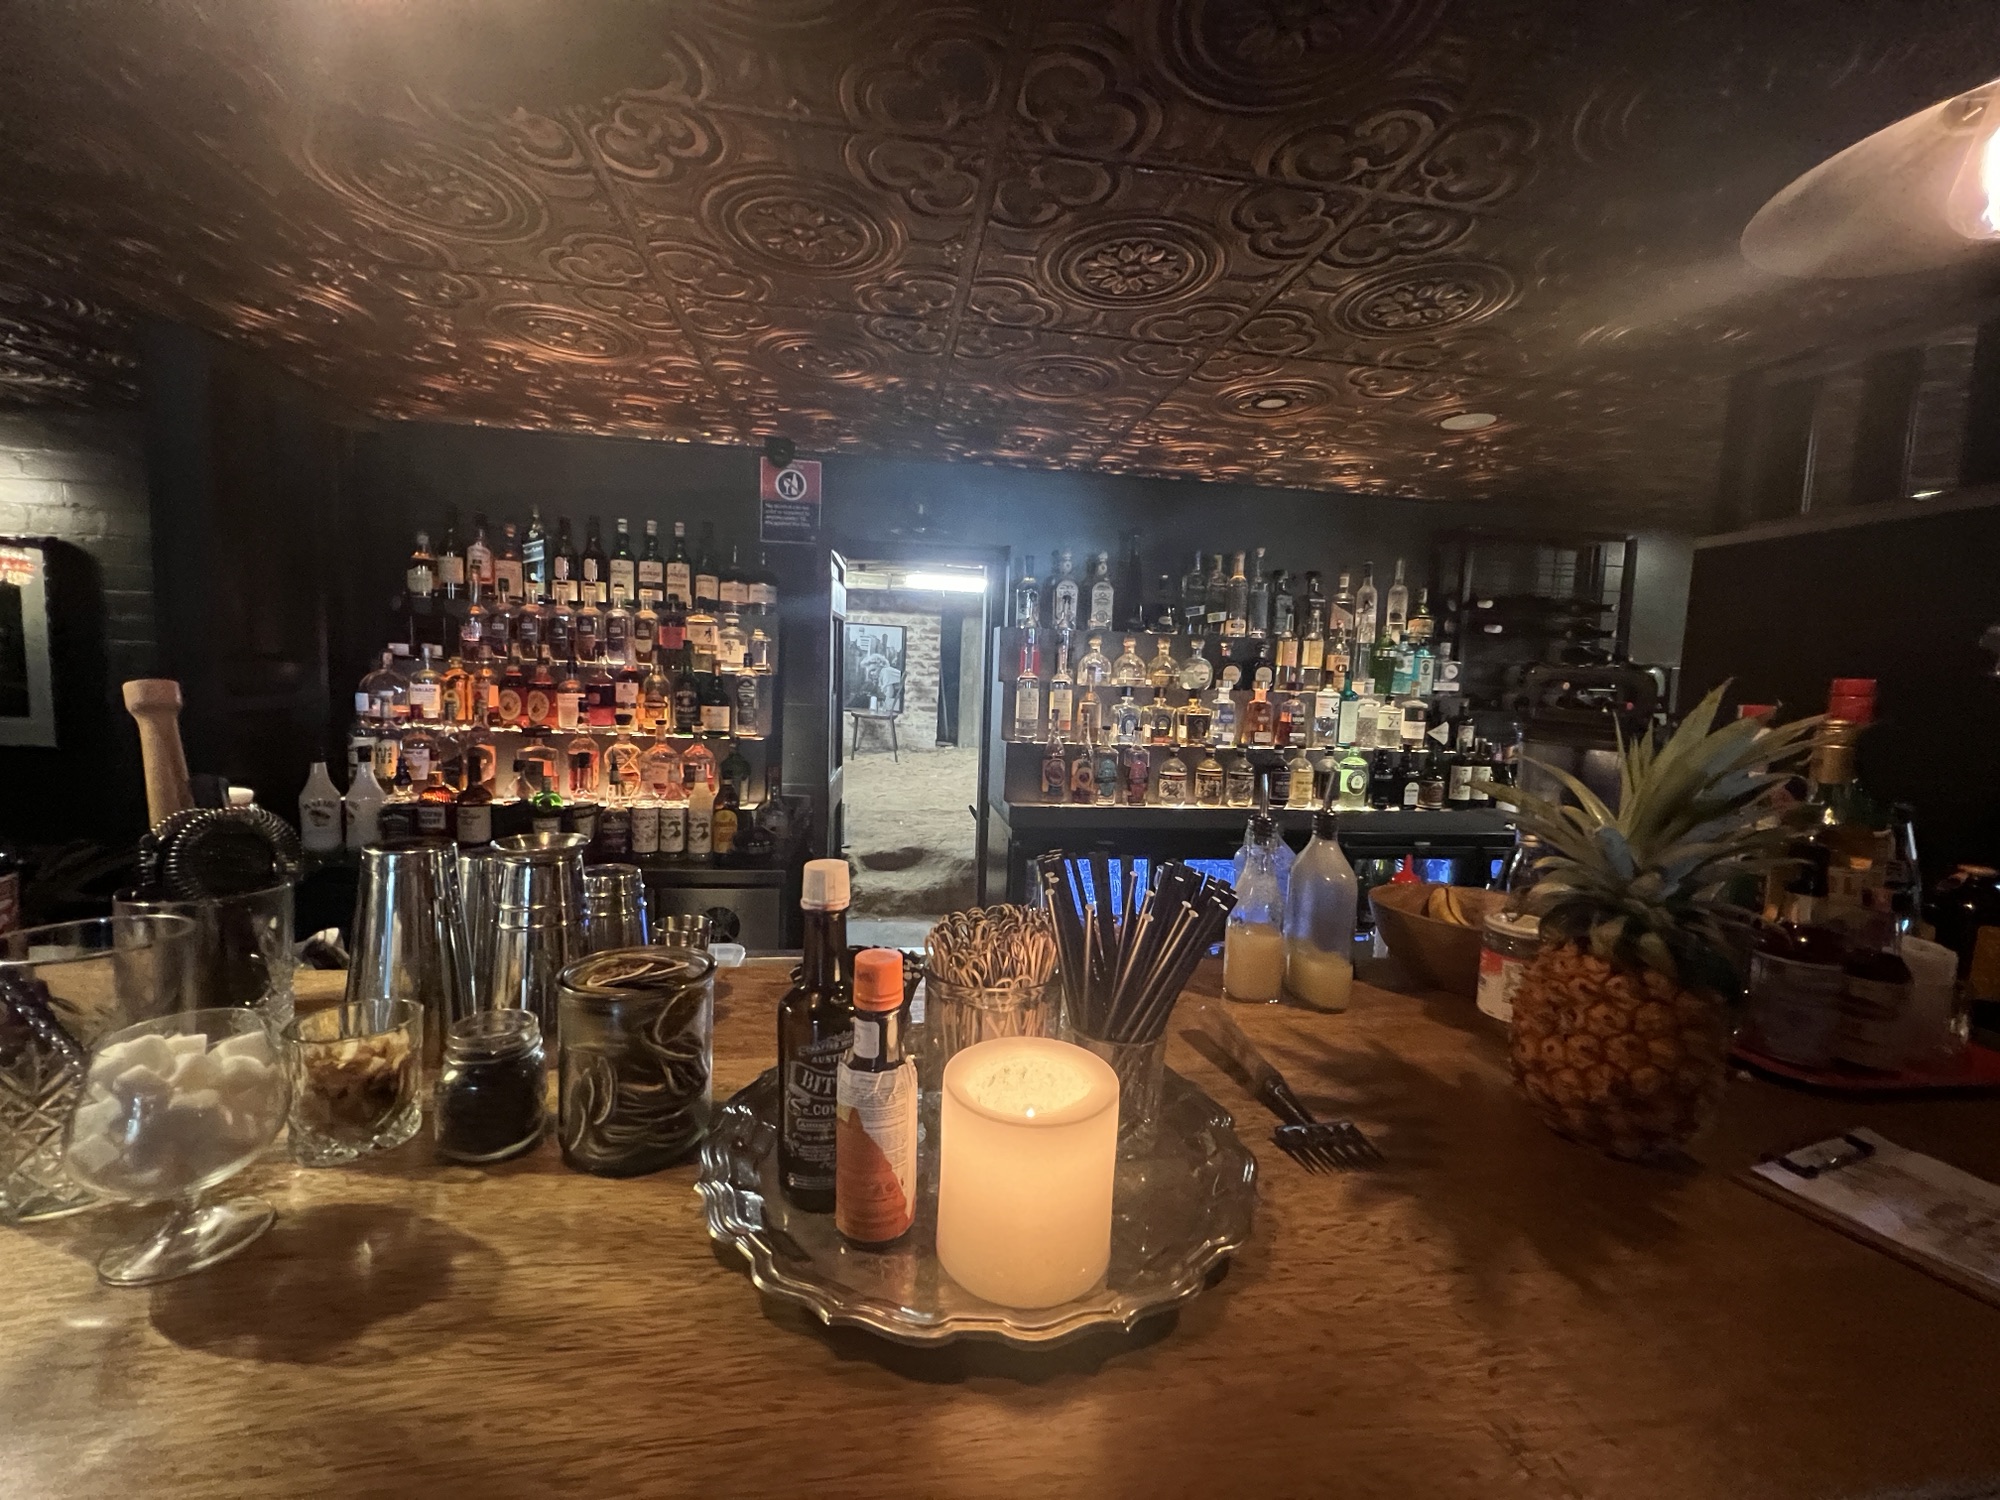
SIPS AND SECRETS: JERRY SENT ME
Last night my cousin recommended we head out to this cool place she had heard great reviews about. And wow, just wow! This would have been the most unique hospitality experience we’ve ever had! Jerry Sent Me is a cocktail bar born from the idea of the speakeasy bars from…